Need to install a fresh copy of Windows?
Booting Windows 10 (and Windows 7) from a USB stick is straightforward. Within minutes you can have a fresh new version of Windows installed on your PC, laptop, or media center.
Here’s everything you need to know about installing a fresh copy of Windows 10 from a bootable USB stick.
Why Boot a Windows Installation From USB?
If your spare PC doesn’t have an optical drive, or you’re out of DVDs, a bootable USB stick is the best solution.
After all, a USB stick is portable, and you can guarantee it is compatible with every desktop and laptop computer. While some computers might be missing a DVD drive, they all have a USB port.
It’s also quicker to install from USB. A USB drive can be made bootable faster than an optical drive can; it also installs the operating system quicker.
To install Windows 7 or Windows 10 from a USB stick, you need a device with at least 8GB of storage. Before proceeding, ensure that your USB flash drive has been formatted.
Ensuring USB Stick Has UEFI Boot Support
Before you download a bootable Windows installation image, it’s important to know the difference between UEFI and BIOS.
Older PCs rely on the basic input/output system (BIOS) to boot the operating system and manage data between the operating system and devices. For the past decade, UEFI (Unified Extensible Firmware Interface) has replaced BIOS, adding legacy support. UEFI can assist with PC diagnosis and repair without additional software or media.
Fortunately, the most common methods of installing Windows 10 from a bootable USB drive support UEFI and legacy BIOS hardware. So, whichever option you choose should work for your hardware.
Preparing the Windows 10 Bootable USB
Before proceeding, insert your formatted USB flash stick in your PC or laptop.
Ready to install Windows 10? While several methods exist, the easiest way to do this is to use the Windows 10 Media Creation Tool.
To grab this, head to the Microsoft Download Windows 10 page and click Download tool now.
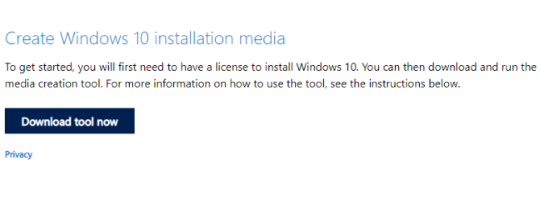
Save the tool to your computer. It’s around 20MB in size, so shouldn’t take too long on a fast connection. Once downloaded, launch the media creation tool and click Accept when prompted.
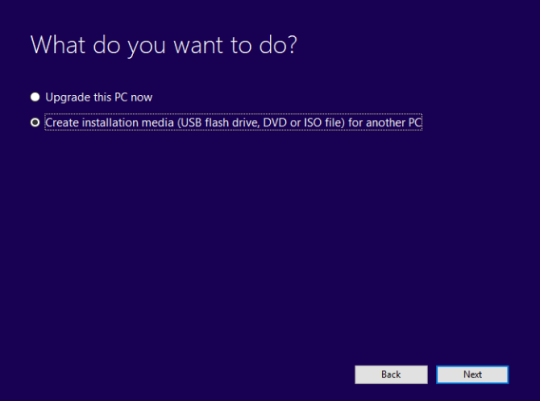
You’ll be presented with two options. Select Create installation media (USB flash drive, DVD, or ISO file) for another PC and click Next.
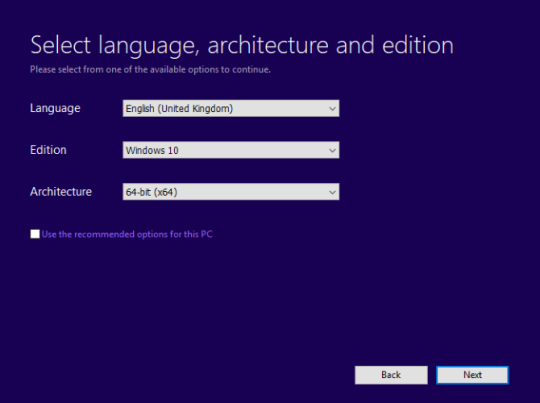
Set your preferred Language, Windows 10 Edition, and system Architecture. Note that if these settings cannot be changed, you should clear the checkbox labeled Use the recommended options for this PC. Hit Next again.
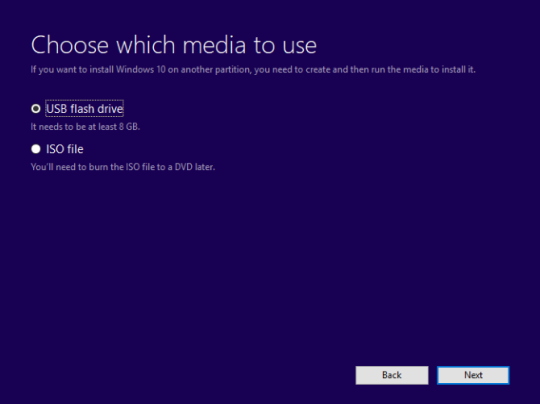
Choose USB flash drive, then Next, and select the USB drive from the list. Click Next once more to prompt the downloading of your Windows 10 installation files.
Wait while the bootable USB Windows 10 installer is created. How long this takes will depend on your internet speed. Several gigabytes of data will be installed, so if you don’t have access to a fast internet connection at home, consider a library or even your place of work.
Installing Windows 10 With a Bootable USB Drive
With the installation media created, you’ll be able to install Windows 10. The USB drive is now bootable, so all you need to do is safely remove it from your PC, then insert it into the target device.
Power up the computer you’re installing Windows 10 on and wait for it to detect the USB drive. If this doesn’t happen, reboot, this time pressing the key to access the UEFI/BIOS or boot menu. Ensure the USB device is detected, then select it as the main boot device.
The subsequent reboot should detect the Windows 10 installation media. You’re now ready to install Windows 10! Get started by starting the installation wizard.
Once you’ve worked through the wizard, Windows 10 will be installed. Note that some installation may continue after you log in, so be patient. It’s also worth checking for Windows Updates (Settings > Updates & Security > Windows Update) after installation to ensure everything is up to date.
How to Install Windows 7 From a Bootable USB Drive
What if you’ve had enough of Windows 10? If you own a valid license for Windows 7, you can also install this from a bootable USB drive.
The process is largely similar, although for older PCs you won’t need to worry about UEFI support. Windows 7 is a great option for newer PCs in terms of being comparatively lightweight. However, support for the operating system ends in January 2020. As such, you should ensure that you upgrade to a more secure operating system when the times comes.
See our full guide to installing Windows 7 from a bootable USB drive for details.
Keep Your Bootable Windows Installation USB Drive Safe
Making a bootable Windows USB drive is simple:
Format an 8GB (or higher) USB flash device
Download the Windows 10 media creation tool from Microsoft
Run the media creation wizard to download the Windows 10 installation files
Create the installation media
Eject the USB flash device
While you should expect largely trouble-free computing from Windows 10, it’s a good idea to keep the USB boot drive safe. After all, you never know when a hard disk drive can crash, or a partition table will corrupt.
The Windows boot drive features various repair tools that can be used if Windows 10 will not boot. Store the boot drive in a memorable place where it can be easily retrieved for troubleshooting or reinstalling Windows later.
While you’re considering using USB devices for system recovery, why not create a PC repair toolkit on a USB stick?
Welcom to batteriestore.co.uk!We are a manufacturer representative and wholesaler that specializes in Laptop Batteries and Laptop AC Adapters . We have tested Batteries from virtually every manufacturer on the market. Our commitment is to provide our customers with the price/performance available on the market.
Please read the product details carefully to ensure that the brand, model and compatibility of the laptop battery you purchased meets your needs. If you need help, please contact us. Email: info@batteriestore.co.uk.