If you’ve got a lot of apps and programs installed on your Windows 10 system, you might want to move them to another drive to free up space. It may also be necessary to change your default install location. Happily, all of these things are possible.
Windows has a built-in utility that allows you to move modern apps to a location of your choice. Although this method doesn’t work for traditional desktop programs, it’s still possible to move these programs to another drive.
Let us show you how to move an app or program to another drive.
How to Move Apps & Programs to Another Drive
It’s quick to move most of the native Windows apps, but the process of moving anything else will require additional work. First, we’ll outline the process for Microsoft Store apps, then we will take a look at traditional desktop programs.
Modern Apps
Press Windows key + I to bring up the Settings menu and click Apps. You should be on the Apps & features page of the left-hand navigation.
Here you will find a list of all apps and programs installed on your system. Some of these apps might have come with your system, the others you installed yourself. This method will only work with the latter group.
Scroll to the app that you want to move and select it from the list. Now, click Move. Select the new drive location from the dropdown, then click Move again.
You can repeat the process if you ever want to move the app back or to a different drive.
If the Move button is greyed out, it means it’s a Windows 10 app that can’t be moved. If you see a Modify button instead, it’s a traditional desktop program and you’ll need to follow the method outlined below.
Desktop Programs
Microsoft doesn’t recommend moving the file location of installed programs because it can cause issues, like the program ceasing to run. A safer (though less efficient) method is to uninstall the program and then just reinstall it to your desired drive.
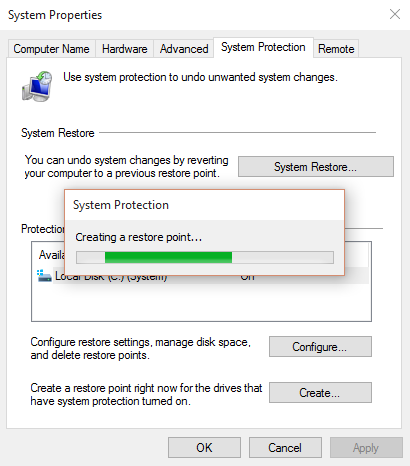
If you do want to proceed, create a restore point so you can reverse the changes, if anything goes wrong.
We recommend using a program called Steam Mover. This was originally designed to move Steam games between drives, but will actually work on any program. You can use it to move programs from your HDD to SSD, for example.
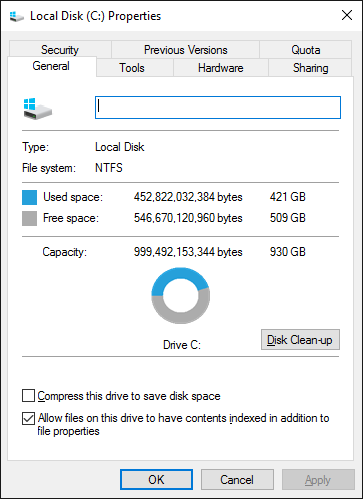
Note that any drive you want to use with this program, whether it’s where the installed program currently sits or where you want it moved to, needs to be in the NTFS format. You can check this by loading File Explorer and then clicking This PC from the left-hand navigation. Now, right-click a drive and select Properties. Refer to the File system to see if it’s using NTFS.
Open Steam Mover. First, select the … button next to Steam Apps Common Folder to select the folder path which contains the program you want to move (for example, your Program Files). Now, select the … button next to Alternative Folder and select the folder path where you want to move the program to.
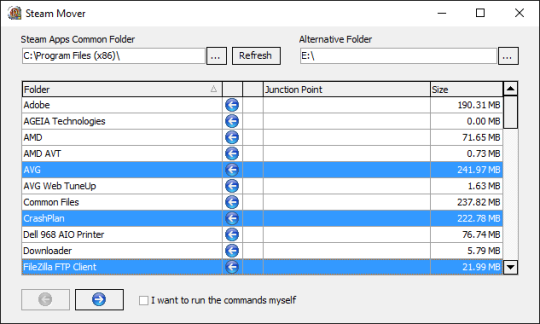
Next, select the program from the list that you want to move. You can select multiple programs by holding CTRL as you click. When ready to move, click the blue right arrow at the bottom to begin. Command Prompt will open and process the move. When complete, you’ll see the new folder path next to the program in the Junction Point column.
How to Change the Default Install Location
If you just want to change the default install location for apps, that’s simple. Changing it for standard programs is a bit more complicated.
Modern Apps
Press the Windows key + I to bring up the Settings menu. From here, click System and then select Storage from the left-hand menu.
Underneath the More storage settings heading, click Change where new content is saved. To change the default drive for new apps, use the New apps will save to: dropdown.
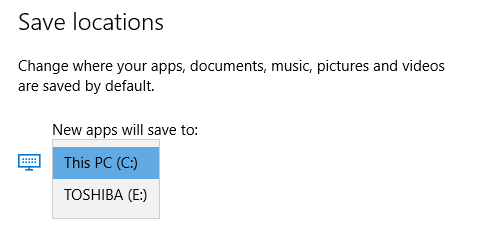
app save locations
You will notice that this page also allows you to change the default location of things like documents, music, and pictures.
Desktop Programs
Microsoft doesn’t recommend changing the default install path for programs. Doing so could cause problems with existing programs and some Windows features. It’s best to perform this operation on a clean system. If that’s not suitable, create a restore point so that you can roll back if necessary.
The majority of programs will let you change the install path when installing them, which might be a better solution than fiddling with the system.
If you do want to proceed, we recommend a program called Install Dir Changer. Download it from SourceForge and then run the program.
Once the program has opened, click Enable Editing and then click Yes when the User Account Control window pops up. You’ll now be able to select a default install path, using the … button to browse to a folder path if necessary.
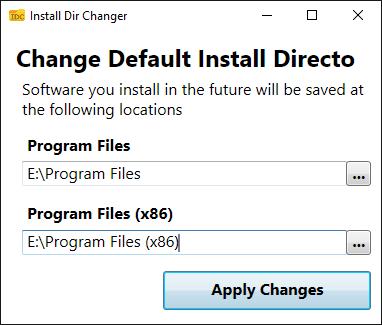
install dir changer
Program Files is where 64-bit applications will be installed and Program Files (x86) is for 32-bit applications. If you’re not sure what that means, read our guide for the difference between the 32- and 64-bit versions of Windows. But you’ll probably want both of them on the same drive anyway.
Once you’ve selected your new path, click Apply Changes. Now all new programs you install will default to these folder paths.
Clean Up Your Drive
Now that you know how to move your apps and programs and how to change their default install location, you can free up space on your drives. But remember to take all precautions when using the third-party programs.
And if you want to salvage even more disk space, consider deleting old Windows files and folders. Along with having moved your programs to another drive, you’ll have a superbly organized drive.
Welcom to batteriestore.co.uk!We are a manufacturer representative and wholesaler that specializes in Laptop Batteries and Laptop AC Adapters . We have tested Batteries from virtually every manufacturer on the market. Our commitment is to provide our customers with the price/performance available on the market.
Please read the product details carefully to ensure that the brand, model and compatibility of the laptop battery you purchased meets your needs. If you need help, please contact us. Email: info@batteriestore.co.uk.